Opera 10.50 beta brings faster JavaScript

1 komentar

Browsers that this one provides specific advantages than ever. Previous attempts to precede Chrome as the fastest web browser today. Opera provides security facility frameworks and allows developers to create widgets that run as separate processes and could even exist outside the Web browser.

Opera beta to version 2 from 10:50 to elegant enough, because they do not need to localhost xampp menambahka in making websites ofline. With the addition of widgets that seem interesting enough to make light of Akselarasinya previous versions and support for Javascript.

Tops on the list is a new JavaScript engine, dubbed the "discussed" that claims the Opera walked eight times faster than Opera 10's. Also under the tent is a better adherence to Web standards like HTML5 and CSS 3 and the new "Vega" high-performance graphics library.

There are also some special tweak the Mac, thanks to the underlying Opera Cocoa frameworks, including the toolbar unfied, native UI widgets, Growl support, and multi-touch gesture compatible MacBook and MacBook Pro. And the new Opera Widgets platform seems like a response to Firefox and Chrome's extension framework, allows developers to create widgets that run as separate processes and could even exist outside the Web browser.

In front, 10.50 Opera sports a number of new end user features such as search engines easily adjusted, a more intelligent address field search capabilities and the ability to delete a page from history, private browsing window or tab, increase the find - on the page, the ability , and dialog boxes that appear as a layer of pages, which allows you to switch between pages or windows without having to interrupt your browsing.

10.50 opera beta 1 is a free download; it requires Mac OS X 10.4 or later running on Intel-based Macs. Companies are more promising improvements that will come beta.
Continue Reading... Label:


Opera 10.50 Beta Want Overtaking Chrome

4 komentar

Google's innovations in Chrome browser gush made a number of other developers misgivings. Not to mention the amount of Chrome users increasing since 2009 and launched at the end.

For the Norwegian browser developer, Chrome is a tight competition. Opera therefore working hard to overtake another browser Chrome and Apple Safari browser on the market.

Recently rumored 10:50 Opera launches Opera beta 2 for windows with the introduction of JavaScript engines. Recognized merka Opera has done limited testing on these browsers. For the current speed matters Opera was able to claim 10:50 Google Chrome overtaking.

Launch Opera has done approximately 100 changes in beta 2 version is 10:50. 10:50 Compared beta 1, this version comes with a number of new features that will allow users to surf the internet.

Competition in the browser market is still dominated by Internet Explorer and Mozilla Firefox. Apple Safari, Chrome, and Opera continue to try to seize the position under the top two browsers.

Continue Reading... Label:


How to Speed Up Windows & Make it Run Extremely Fast

3 komentar

Windows might be two of the most advanced computer systems in the World, but its still liable to jogging slowly. This is a problem which even the most advanced of systems are unable to keep away from & is actually caused by a simple part of your PC. Here's how to fix it.

The real 'secret' behind speeding up your PC is to fix all the errors that it's. The problem with plenty of Windows systems is that whenever you use it, files inside the 'registry database' are continually being corrupted, making them difficult to read. These files contain the settings that your computer needs every time you use it - with such information as your latest emails, desktop wallpaper & settings being kept in there.

Not plenty of people realize this,but in order to get your computer jogging fast again (like new) is to actually recreate the conditions that your PC had when it was new & able to run quickly. & this is all down to the amount of errors that your method had at that time. New computers had little or no errors on them, meaning that whenever you used the method, it could find the files & open the settings it wanted without any hassle. However, as your PC grows older, it starts to create increasingly errors which slow it down.

The 'registry' is the main cause of computers that run slow, because of the way that it is used & how it is treated. Every application application & program on your computer needs to use plenty of different registry files each time they load, meaning that whenever you use your PC, 100's of settings from the registry database are being used. This is all right, but because so plenty of files are open at once, Windows ends up saving plenty of of them in the wrong way, leading them to become damaged & corrupted. & this is what makes your PC run slow - because the next time Windows wants to open these files, it cannot read them & has to take longer to method them.

Think of the registry as a phone directory with all of its listings in the wrong order. That is what slows your computer down - because it is constantly corrupting more registry files, making your PC run slower every time you use it. Fortunately, fixing this problem is actually simple thanks to the invention of registry cleaners. These are application programs which scan through the registry database & fix any corrupt or invalid settings that are slowing your PC down. Depending on how plenty of errors your computer has, these registry tools can improve PC performance dramatically. You ought to download two & then use the demo to see how plenty of errors your method has. If it's over 500 errors, then its worth using the gizmo to remove them all.

You can speed up Windows and make it run like it did when it was new by getting a good registry cleaner.
Continue Reading... Label:


Migrate Access Database To SQL

0 komentar

Database converter is an advance utility to convert entire database records or particular tables from MS Access to MySQL database server accurately. MS Access to MySQL DB migrator program supports all MS Access information types, indexes & attributes including null, primary, foreign or distinctive key constraints. Database conversion tool also migrate password protected Microsoft Access database (MDB) files to MySQL server. Database converter utility supports all major versions of MS Access database server & does not change the functionality of database during conversion. Database migration program supports Unicode architecture with multibyte character sets & maintains database integrity for accurate DB conversion. Database converter utility facilitates users to overwrite the contents of existing MySQL database or save the converted MS Access database records as new location database. DB conversion application efficiently converts database tables from MS Access server to MySQL format without any information loss. MS Access database migrator is an economical tool that requires less space of your hard disk & time to perform database conversion method.

Migrate Access Database to SQL version 2.0.1.5 available in best reasonable price only $45 US dollars (Rs. 2,154approx).
Features:
  • MS Access to MySQL DB migration program converts MS Access database tables in to MySQL server in an efficient manner
  • Database converter utility supports all MS Access information types, attributes, indexes, null value, primary key, distinctive key etc while converting the database records
  • Access to MySQL DB conversion tool has an interactive graphical user interface
  • Instantly converts table’s records with attributes & indexes keys.Supports conversion of MS Access database in to MySQL database or overwrite the converted database records
  • Program supports all major versions of Microsoft Access & MySQL database with necessary information types & attributes
  • Provides interactive wizard style Graphical User Interface
  • Supports all major Windows based operating method & provides step built help menu for the assistance of users.
For more detail and information logon to following website link URL:-
http://www.p-dd.org

Link Download : Here
Continue Reading... Label:


How to encrypt USB drives

3 komentar


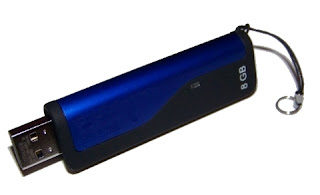
As a cheap and efficient device to move data between computers, a USB drive is a good choice to store your valuable and vital data. But the only problem is when the USB drive with sensitive information gets lost or stolen! It may be a disaster to you because the lost or stolen USB drive may lead to the leakage of your privacy or your confidential company data.

Fortunately, USB encryption software which enables you to encrypt USB drive can help you avoid the disaster. Personally I recommend Wondershare USB Drive Encryption for its strong protection for USB drives. It allows you to create a resizable and password protected secure area on USB drive for your vital data. And you can easily access to the data on encrypted area with correct password in any computer without it installed. Besides, it is easy to use. Read the following steps, and you’ll find how easily to encrypt USB drive with the encryption tool.

Step 1: Download Wondershare USB Drive Encryption from here and follow the step-by-step guidance to install it in your computer.

Step 2: Start Wondershare USB Drive Encryption and plug-in your USB drive into computer
Note: Please remember to backup the files on the drive before encrypting your USB drive because the software will format your USB drive automatically during encryption.

Step 3: Select your target USB drive and set the size of secure area, and then click Install.

Step 4: Set user name and a password of six characters at least in length for secure area, click OK.
The password should be easy for you to remember while hard for others to guess. And you’ll never get it back if you forget it.

A secure area has been created on USB drive which means the USB drive is encrypted. So now you can store all your personal data like credit card information, your online banking passwords or anything for that matter on your encrypted USB drive without anything to worry about.
Continue Reading... Label:


Computer Shut Down Error - Does Your Computer Randomly Shut Itself Down?

0 komentar

Have you recently had a computer shut down error, where your PC just randomly shuts down for no apparent reason? If so, then you need to read this article, because here I've put together some advice to help you. I'm going to be talking about overheating CPU, failing RAM, programs running in the background, and the registry.

Overheating CPU

One possible cause of the problem is that your computer's processor could be overheating. If you use a lot of music or video programs, they can end up using a lot of CPU power, and as a result your CPU can overheat.

Download a free program called Speedfan (search for it on Google), and use this to check the temperature of your CPU. If it is above 60 degrees then you're in trouble. You may want to open the case and clean dust from your CPU fan, and this collected dust can reduce the cooling effect of the fan.

Failing RAM

If you determine that the CPU temperature is not the cause of your problem, consider that your RAM chip(s) may be malfunctioning. One thing you can do to test this is to open your case and carefully remove one of your RAM modules, and see if the problem goes away. If it does, then you may need to replace the faulty RAM module.

Programs Running In The Background

Another option worth considering is that one of the programs running in the background may be causing the error. One method of disabling specific programs from running when Windows boots up is to use MSCONFIG. To run MSCONFIG, in Windows XP go to Start, Run, then type in "msconfig". For Windows Vista or Windows 7, Click the Windows button and then type "msconfig" into the search box.

In MSCONFIG, go to the Startup section, and de-select any software that you are sure that you definitely don't want to run at startup. Warning: Don't disable any software that you're unsure about.

Perform Registry Scan

Many Windows problems can be fixed simply by performing a registry scan. There are many registry fixing programs, and some are definitely better than others. For help in choosing the best registry scanner visit Registry Fixers now.

Continue Reading... Label:


Making the right choice while purchasing a CD/DVD publishing and printing unit

0 komentar

It's not hard to make decisions when you know what your values are.” A right decision in acquiring a disc publishing and printing unit can really work wonders with faceless media. How about a presentation DVD for the clients with the company logo and punch line, your digital modelling portfolio that gives a glimpse of your beauty. How about opening a kiosk? Not just this, we can also produce the most popular applications include video and music content, software, press kits, trade show handouts, instruction and training manuals, technical documentation, PowerPoint Presentations, catalogs and more. A CD/DVD publisher can be a great help to us when trying to accomplish the above points. One of the things that we have to be sure of, is the unit we buy has fantastic software. With the right CD & DVD publishing software, we can do more than simply create a CD or a DVD. We can also create effective marketing materials with it and many more. How about gifting your girlfriend a CD with all her favorite songs with a photo of your rosy-eyed duo printed on the top of it? Well, everything is possible with a right choice we make while purchasing a CD/DVD publishing and printing unit. There are some factors that matter a lot in choosing a publishing unit. Some of them are:
  1. The quality of the CD/DVD publisher and printer definitely makes a difference to our digital media.
  2. The cost and capacity of production are the factors that define the performance standards.
  3. Ink costs are the main consideration when buying a CD/DVD publisher unit followed by the speed of production and capacity. Higher the speed and larger the capacity, more expensive the CD/DVD publisher/printer will be.
  4. The reliability of a CD/DVD publisher develops the framework that links specifications and product performance. The product reliability allows us to choose products that can project service costs, warranty costs and predictable sparing levels that will allow us to optimize profitability.

So, in the era of media publishing, XLNT Idea brings us the perfect media as a solution and can make our dreams come true. This excellent product can make our loved ones happier than ever. XLNT Idea is one of the well acknowledged names in the publishing and printing industry, not only in the originality in printing technology, but also has a distinct presence in the entire industry of innovative technology. XLNT Idea has introduced the Nexis series as the industry's leading DVD/CD Publishing Solution. The Nexis series come with an advanced print engine and the DiskWorks software that provides an intuitive, user-friendly label editing job available today.

Ensuring features like, easily design labels, print, and burn discs of superior quality, with its 50-disc input capacity and small desktop footprint make it perfect for business and personal requirements. XLNT Idea’s CD/DVD publisher & printer come with single as well as dual CD, DVD and Blu-Ray drives. Integrated with a disc transport robotic system that can move discs while printing which achieves the highest throughput. Nexis series have introduced the six-color quality for best print and photo-realistic images. But XLNT Idea products can work along with Windows XP, 2000, 2003 server to Vista. XLNT Idea Nexis series products are very economical with an elegant look and feel. Unique products with multiple features will definitely make the job of printing and publishing simple and easy. So, we will definitely feel delighted after purchasing the amazing product from XLNT Idea Nexis series.
Continue Reading... Label:


Cable Management Tips for Computers

0 komentar

Computers are getting more advanced, especially wireless technology and connectivity, but it will probably be some time until a complete wireless office is a reality. Until then, computer work areas are going to need cable management for optimum safety and visual acceptance.

Cable management includes clamping, labeling and routing. There are various products to bundle cables together:

  • Spiral Wrapping – This can be wrapped around cables without disconnecting them. It is flexible so routing of the bundle is easy
  • FLEXO WRAP - A hook and loop expandable sleeve designed for quick and easy bundling and protection of wire, cable
  • Cable Ties – These are nylon ties available in various lengths and colors. They can just bundle a group of cables or secure to another item
  • Velcro® Ties – These are similar to cable ties, but using Velcro®. Some have a mounting hole to secure to a something solid
  • Cable Management Box – Made from plastic and holds up to seven cables. About 15” in length and 4” wide with self-adhesive sticker for mounting
  • Clips & Clamps – There are various individual clips and clamps to mount cables to a stationary object

To start cable management, group cables generally going to the same destination. Don’t bundle power cables with data cables if the run is more than a few feet. The electrical field from a power cable can sometime interfere with data signals (USB, network, printers, etc)

Next, secure the cables together with tie or wrap. Pay attention to routing since bundling a group of cables together sometime requires a cable to be longer than it actually is.

If there is a surge protector, position it for easy routing of power cables. Power adapter units sometime take two spaces when plugging into a power strip. Use a universal power cord adapter to alleviate the problem. This is a one foot power cord extension that allows the power adapter to be located about a foot from the power strip allowing use of all the receptacles.

After implementing cable management, all the cables will be more secure and look a lot better!
Continue Reading... Label:


Outsourcing Data Processing will help to Small Business

5 komentar


Data Processing is one of the very crucial works for any small or medium level business. To become most successful in the data entry and data processing type of task, it’s necessary to do hard work to running our business long time. In this BPO industry there are many users who are doing data entry work this is online data entry type of work. To get online data conversion, processing and image processing work, you have must proper knowledge about it. From data entry outsourcing works you can hire own professionals and will do more effectively online data entry, image and data processing work.

Whenever, you may need updated and correct data about the work you are doing and for this you must ensure that the data is updated at all times. Outsource means to give out your work to a third party so that you can ease off the burden of workload that you have. With the help of data entry outsourcing, you can free up the staff working for your business. You can make use of their manpower and skills to concentrate on other key sectors of your business.

Data entry outsourcing services which you will carry out for your small business depends on the amount of work that you want to be done. You can find freelancer as well as big companies who can do data entry outsourcing for clients. So suppose you need the services for a short duration of time, may be only for one or two projects, you can hire the services of a freelancer for data entry outsourcing. If you need data entry works on a regular basis, it is best to hire data entry outsourcing services from a reputed outsourcing company.

You must realize the fact that every small business requires appropriate data to be successful. Data Entry Outsourcing UK Company which provides data entry outsourcing services to clients of specially UK, USA and Canada for these various types of small business.

If you want more information about data entry, data processing work, Contact us at: http://www.dataentryoutsourcing.co.uk/contact.php
Continue Reading... Label:


Creating Bootable Ghost CD/DVD

2 komentar

Step by step creating Ghost Bootable om CD/DVD

1. Identify the ghost image you would like on the bootable GHOST CD/DVD
2. Split the image so it will fit onto a CD or a DVD.
Note: A CD will hold approximately 650MB, and a DVD will hold up to
approximately 5GB. Thus, if you are creating an image for a machine that has
a DVD ROM, your ghost image is less than a combined 5GB, and you have a
DVD burner, you will be able to create 1 bootable GHOST DVD. If this is the
case go to Step 5.

As you can see the EXAMPLE.GHO ghost image is approximately 2GB.
Here you will see how to split the image into 600MB lots that will safely fit onto
CDs, making a total of 5 CDs. Note: This is a large ghost image as it contains
many programs. Generally a ghost image with the essentials will fit onto 2
CDs.

2.1 Double click on Ghostexp.exe

The following screen will appear:
2.2 Select File -> Open
The following screen will appear:

Select your ghost image and then select Open.

2.3 Select View -> Options

The following screen will appear:

2.4 Enter the desired size for each CD.
For older CDs choose a size between 600 and 620MB. For newer CDs
choose a size between 650 and 680MB. Tick Autoname spans. This will
automatically name the image splits. Select OK.

2.5 Start the image splitting process.
Select File -> Compile -> Select a location for the new files-> Type a name
for the first file.
Note: to avoid confusion, ensure that the new file name and location are
different to those of your original GHOST image. Below you will see a new
folder called ‘Image Split’, with the first file name of ‘exghost.gho’

Select Save.
As soon as you do this the splitting process begins. You cannot close the
GHOST Explorer window until the entire process is complete. Note that the
progress is displayed in the status bar at the bottom of the GHOST
Explorer Window
.

2.6 Continue the image splitting process
Each time GHOST finishes writing one of the split files the following
message will appear:

Select OK. This could occur a number of times depending on the size of your
original GHOST image.

Once the image split process has been completed the new ‘Image Split’ folder
we created will contain the original 2GB GHOST image broken up into 600MB
lots. Each one of these files represents the contents of 1 CD: you will see
below that there are 5 CDs in total. Note: the first file has the .gho file
extension; the subsequent files have the .GHS file extension. This is normal.

3. Creating the Bootable Floppy Disk for the CD/DVD.

3.1 Download the bootdisk.zip file onto the hard drive from:
LOCATION.

Double Click on the bootdisk.zip icon to open it.

Run the bootdisk.exe file from the hard drive.

When the following prompt appears insert a new floppy disk and click OK.

The following message will appear:

Press "Yes" to continue. You will see the progress bar:

3.2 Download the ghost.bat file onto the hard drive.
You can download this file from the following location: LOCATION
Extract the zip file to a folder. In Notepad open the file you just extracted:
GHOST.BAT. It looks like this:

Highlight 1st.gho. Change this to your first split file name, in this case, exghost.gho
The line now reads:
GHOST.EXE -clone,MODE=pload,SRC=%CDROM%\exghost.gho:1,DST=1:1 –sure
Double check the line to make sure it contains no errors. After it has been burnt to a
CD there is no way of editing it. Save the file.
The finished version of the ghost.bat file in Notepad will look like this:

4. Create a bootable GHOST CD
This process is shown here using NERO Express 6 burning software, but many
other burning software packages are capable of creating bootable CDs.

Select Data -> Bootable Data Disk. Make sure the bootable floppy disk you created
is now in the floppy drive.

Add the following files to the list for burning:
- The ghost.exe file from the GHOST folder

- The ghost.bat file that you edited, in this case: (GHOST.EXE -
clone,MODE=pload,SRC=%CDROM%\exghost.gho:1,DST=1:1 –sure)
- Your first split image, in this case: exghost.gho from the ‘Image Split’ folder.
You should now have a list of files like this:

Once all these files appear in the list, select Next.
The following screen will appear:

- Select Read Boot disc in drive and ensure that Drive A is selected. Check
that your bootable floppy disk is in the A Drive.
- Select Next.
The following screen will appear:

Select Burn.
You have now successfully created a Bootable GHOST CD

Burn the other split images onto CDs. DO NOT use the bootable disk process
or add the ghost files: just a simple data burn of the ONE file is needed, eg.
exgho001.GHS, exgho002.GHS, exgho003.GHS, etc.
Your second and subsequent CDs will contain only one file, eg:

Third CD:

To use or test the bootable CD make sure you set the boot order in your system's
BIOS so the system will boot from CD-ROM. Place the first CD in the drive and follow
the on-screen instructions. 5. Preparing to create a bootable GHOST DVD
If you are creating an image for a machine that has a DVD ROM, your ghost
image is less than a combined 5GB, and you have a DVD burner, you will be able
to create 1 bootable GHOST DVD. The ghost image used in the above example
EXAMPLE.GHO is approximately 2GB.

This will easily fit onto 1 bootable DVD as opposed to 5 CDs.

5.1 Adjust the ghost.bat file
You will need to adjust the ghost.bat file (refer to Step 3.2) so the line reads:
GHOST.EXE -clone,MODE=pload,SRC=%CDROM%\EXAMPLE.GHO:1,DST=1:1.
Save this file in Notepad. It will look like:

5.2 Create a bootable floppy disk (refer to Step 3.1)

5.3 Create a bootable GHOST DVD
This process is shown here using NERO Express 6 burning software, but many
other burning software packages are capable of creating bootable DVDs.
Select the DVD Recorder from the drop down menu.
Select Next.

You will notice that you are able to fit a large amount of data on this disk.
Select Add and find the following files:
- The ghost.exe file from the ghost folder
- The ghost.bat file that you edited in Step 5.1
- Your entire ghost image, i.e. EXAMPLE.GHO
Your list will now look like this:

Select Next.
Ensure that the bootable floppy disk you created is in the A Drive and adjust
the option to select it.

Select Next and then Burn.
You have now successfully created a Bootable GHOST DVD.
Continue Reading... Label:


Facebook kembali dengan Perubahan Baru

0 komentar

Facebook yang memiliki rangking 2 dialexa dan menjadi media yang sangat digemari oleh banyak orang dan remaja, karena banyaknya member yang bergabung di facebook membuat pengelola facebook meningkatkan semua performannya mulai dari Aplikasi, Game Online serta tampilannya yang pada malam ini telah saya lihat, maklum dari pagi belum buka Facebook jadi sedikit kaget.

Ternyata tidak percuma Facebook menduduki peringkat ke 2 di alexa page rank setelah google. Karena perkembangan dan fasiltasnya yang mampu memudahkan dan memanjakan Membernya dalam menggunakan media tersebut baik Chatting, Group, serta aplikasi yang memudahkan para publisher dalam melakukan penyebaran informasi updatetan postingan artikel di website yang dimiliki.

Buat kalian yang udah tahu dengan perubahan tampilan facebook, mungkin tidak asing namun untuk yang baru jangan kaget yah. Karena semua perubahan ada manfaatnya.
Berikut ini tapilan perubahan yang terjadi:


1. Panduan Tampilan Beranda Depan


2.  Panduan Perubahan Style 


3. Panduan Beranda Menu Utama 


4. Panduan Menu Sebelah Kiri 


5. Tampilan Chatt pada Daskbar


Mungkin tampilan gambar diatas tidak begitu telihat secara maksimal, maklum masih menggunakan komputer jadul yang resolusinya baru 32px itu juga pake VGA konsumsi dari Memori alias Sumbangan. He he
Panduan diatas bisa langsung anda lihat ketika anda masuk ke Account Facebook anda atau klik disini 
Gak terasa udah hampir larut malam, udah jam 12.00, bentar lagi mau pagi aja. Siap - siap istirahat, biar bangun pagi dan sholat subuh gak kesiangan lagi. 

Salam hangat selalu Tech ID.

Continue Reading... Label:


Tip Ningkatin Koneksi Internet

1 komentar

Memang jika koneksi internet yang kita gunakan lemot sering membuat diri kita menjadi kesal dan rasanya ingin marah-marah. Apalagi jika kita memang sering mengalami hal seperti itu, sungguh sangat menjengkelkan.
Tidaks sengaja buka email dan kiriman emailnya cukup bermafaat buat saya dan semua tentunya, kerana beperngaruh terhadap koneksi internet yang digunakan yang semakin hari semaki lambat macam siput.
Tip ini masuk ke email saya dari teman saya namanya  ariedza dari UGM yang sebenarnya memberika Tip Asisten Bisnis lengkapnya Asisten Cara Cari Uang. Bisa dicari langsung di om Google. hehehe

Tip yang dikirimin seperti ini nih.. disimak baik - baik yach biar ngerti. hehehe

Kiat 1 --> Tweak Registery
Caranya (untuk OS Windows XP, Vista, dan Windows Se7en):
1. Klik menu Start > Run
2. Pada kotak dialog Run ketikkan regedit, lalu klik OK.
3. Run
4. Sekarang kita cari alamat registry ini : HKEY_LOCAL_
MACHINESYSTEMCurrent ControlSetServicesTcpipServiceProvider.
5. Setelah kita berada di direktori ServiceProvider ubah nilai-nilai dibawah ini semuanya menjadi 1.
  • DnsPriority=1
  • HostsPriority=1
  • LocalPriority=1
  • NetbtPriority=1
6. Tutup registry restart komputer.

Kiat 2 --> Matikan Tampilan Gambar di Browser

Mungkin cara ini membuat kita kurang nyaman dalam berselancar di dunia maya, betapa tidak, dengan absen nya tampilan gambar di website yang kita browse tentunya akan membuat sebuah website jadi terlihat aneh. Tapi apabila Ridwanosx menginginkan informasi berupa teks (non-gambar) mungkin cara di bawah ini dapat dicoba

Untuk browser FireFox:
1. Klik "Tools" > "Options"
2. Klik tab "Content" di bagian atas
3. Hilangkan centangan "Load Images Automatically", kemudian klik "OK" (untuk mengembalikan settingan seperti semula, centang kembali "Load Images Automatically"

Untuk browser Opera:
1. Klik "Tools" > "Preferences"
2. Pilih tab "Webpages" kemudian di bagian "Images" pilih "No Images" (untuk mengembalikan settingan seperti semula, pilih "Show Images" kembali)
3. Klik "OK"

Untuk browser Internet Explorer
1. Pilih "Tools" > "Internet Options"
2. Pilih tab "advance", cari opsi "multimedia", dibawahnya, hilangkan centangan pada "Show Pictures"
3. Klik "OK"

Kiat 3 --> Mengganti Public DNS
saya pernah coba kiat tentang public DNS dari http://getresponse.com/click.html?x=a62b&lc=2N3j&mc=f&s=hyhbh&y=V& semoga bisa membantu :)


Udah ngerti kan gimana caranya, jadi seakan-akan kita menggunakan koneksi dengan HTML standar alias semacam berselancar di DOS, duh jadul banget.. tetepi tidak segitunya ko.
Penasaran gak nie. Kalo penasaran dicoba aja langsung dan berikan komentar jika memuaskan. hahahah

Salam hangat Tech ID
Satu lagi nie ada ebook gratis mencari dollar dari kang Maliki bisa cek langsung disini


Continue Reading... Label:


Info Bisnis TREK PAY

0 komentar


Minggu sore yang sedikit mendung dan bikin ngantuk. Jalan2 ke blog temen yang berkunjung ke blog Writing BCNT. Saya  liat judul postingannya yang Trek Pay, saya kira itu semacam Paypal atau AlertPay. Ternyata sedikit berbeda, Trek Pay itu semacam kumpul Blogger, Bidvertise, Adsensecamp atau klik rupiah. Semacam gitu deh. Saya sendiri baru meluncur ke TKP dan melihat dalamnya.

Disitu si dijelasin kalo mereka itu baru Launcing, tapi selama beberapa bulan sudah banyak membernya, dan saya termasuk member yang ke 16000. Padahal teman saya itu waktu gabung baru 3000 member, anda bisa liat buktinya disini atau langsung meluncur ke TKP dengan lihat disini.

Kelebihannya yang sudah saya baca dari blog teman saya itu, kita bisa payout setiap minggu dengan penghasilan sekitar $50 jadi kalo sebulan sekitar $200, lumayan kan. hehehe

Tugasnya juga mudah, berdasarkan survey langsung, kita disuruh klik iklan yang ada didalamnnya, dan iklan yang disarankan bisa berjumlah 30-40 link iklan yang muncul.

Tunggu apa lagi, kalo tidak mencoba dari sekarang mana mungkin kita bisa tau kenyataannya.
Siapa tau aja setelah Valentin kita dapat bayarannya. He he... lumayan buat ganti uang yang udah dikeluarkan buat Valentin n beli kado Valenti. xixixi

Masih bengong? atau bingung?
Langsung aja klik disini atau klik banner dibawah ini.


Continue Reading... Label:


Send a Fax From Computer

2 komentar

Familiar with the name fax. Fax function to send a file to another destination.
In the past we do use mailing route Fax on the phone, but now there electronic tool capable of sending faxes with the help of a computer. As has been described by ehow.com the Send a Fax From a Computer and facilitated by the program Benefits of Fax over IP on faxzero.com.
This facility is easier for us as businis


The procedures in use are:

1. Prepare the document that you want to fax.
2. Prepare a fax cover sheet, if desired.
3. Open your fax software - such as Microsoft Fax or Microsoft Exchange.
4. Look for an icon or menu command that allows you to send a fax - such as Send New and Send Fax. Click on that item.
5. Follow instructions for entering the fax number of the recipient and any other requested information. Be sure to include area codes and long-distance information if needed.
6. Indicate whether you wish to send a cover sheet.
7. When asked to attach the file, follow instructions to attach the file that you want to fax.
8. hen ready, click Send. The fax will begin to compile the information and, when ready, will dial the remote fax machine.
9. When the connection is made, the fax will be sent.

To Fax From Your Word Processing Program

1. Some software products, such as Microsoft Word, allow you to fax a document without opening your fax software.
2. Open the document that you want to fax.
3. From the File menu, select Print. The Print window opens.
4. Instead of printing to your default printer, look for an option that allows you to Print to Fax. Select this option and click Print.
5. You will be asked to provide the recipient's fax number and other assorted information as with a fax program.
6. The fax message compiles, the modem dials. If the connection is made with the other modem, the fax will be sent.


Tips & Warnings

  • Long-distance charges may apply.
  • As with any other fax connection, you may encounter a busy signal or you may be unable to connect if the other fax is out of paper, turned off or experiencing technical problems.
  • If you use a modem to connect to the Internet, you can't be online when you fax.
  • Faxing from the computer only works for digital documents that are stored in the computer. You will not be able to fax printed material in this way.

Who Can Help

Continue Reading... Label:


Menyambut Valentin dengan Icon Set Velentin

2 komentar

Tidak terasa kita sudah masuk di bulan kedia di tahun 2010 ini, dimana bulan ini bulan yang amat spesial sekali untuk pada remaja khususnya, karena mereka berpendapat bulan Februari merupakan bulan kasih sayang, bener gak sih?
Konon ceritanya sih seperti itu, namun pada dasarnya sejarah valentin itu berasal dari bangsa romawi, yang sudah terbiasa engan tradisi kasih sayang terhadap sesama kaumnya. Untuk lebih jelas lagi tentang sejarah Valentin anda bisa baca disini.

Kembali ke Judul diatas yaitu menyambut Velentin dengan Icon Set.
Tentunya anda semua bingung dengan judulnya, kenapa harus menyambut hari valentin dengan Icon Set Valentin segala.
Sedikit saya jelaskan, kenapa saya mengambil judul diatas, yaitu karena Icon itu dapat dikiaskan dengan istilah kado atau pun Icon unik buat pasangannya. Huh... So Swit....

Icon Velentin ini juga berawal dari postingannya blognya kang Rohman tentang blogspottutorial.com
Postingan ini cukup menarik buat saya pribadi, karena suka dengan gambar Icon unik tersebut. Untuk Kang Rohman tara rengkiu (terima kasih) banyak2 buat Postingannya yang buat menarik dan semakin menarik dengan Tipnya yang vantastik.


Mudah - mudahan hari kasih sayang di tahun ini memberikan manfaat dan rasa sayang pula terhadap Tech ID. xi xixi. ngarep banget.. Gak juga sih. Tapi boleh donk sedikit Promosi.

Buat anda yang suka dengan Icon Valentin dari kang Rohman bisa download di blognya kang rohman disini atau disini.

Semoga dibulan ini menjadi yang spesial buat kita semua.

Salam hangat Tech ID
Continue Reading... Label:


Mendapatkan PIN Adsense dalam 3 Hari

7 komentar

Tentunya semua udah pada tahu kan yang namanya Adsense Google. Jika belum apa kata dunia?
Tetapi terkadang kebanyakan orang ada beberapa yang belum mengenal Adsense Google.

Apa sih Adsense Google?
Adsense Google adalah PPC (Pay Per Click) Internasional dari Google.com, namanya juga Google Adsense. Yaitu layanan yang dapat menghasilkan dollar yang cukup menggiurkan. untuk lebih jelas bisa langsung lihat ke situsnya aja deh disini

Apa keuntungannya mendaftar Adsense Google?
Keuntungannya yaitu adalah dollar yang mengalir dengan sendirinya namun perlu tip dan trik bagaimana caranya mendapatkan dollar itu dengan bantuan klik dari orang lain.

Bagaimana cara mendaftar Google Adsense?
1. Sebelum mendaftar Google Adsense harus mempunyai Web Site atau Blog gratis seperti di Blogger.com
2. Lihat aja peraturan dan kebijakan yang di kehendaki oleh Google Adsense itu sendiri disini biar lebih komplit.
3. Setelah baca peraturan dan bahasa yang digunakan pasti ngerti. hehe
4. Yang pasti blog harus berusia 6 bulan dan mempunyai banyak postingan minimal 10 postingan dan harus full bahasa inggris.
5. Jika udah semua peraturan diatas kumplit - plit langsung deh daftar di Adsense Google disini

Loh ko jadi malah cara membuat Adsense Google sih. Kan judulnya mendapatkan PIN adsense dalam 3 hari.
Begini loh logikanya, sebelum kita mendapatkan PIN dari Adsense Google ya harus mempunyai Account dulu donk. Setuju gak, kalau iya acungkan jempok kaki yah... he he

Langsung deh ke Judul diatas bagaimana saya mendapatkan PIN adsense dalam 3 hari..

Penanya: Loh ko mas dapatin PIN GA dalam 3 hari bukanya dalam di GA itu 3 minggu atau 2 bulan baru sampe?
Saya: Iya memang benar ketentuannya seperti itu, karena sudah 3 kali minta selama 5 bulan gak dikirim-kirim oleh Google Adsense. Akhirnya saya kirim KTP lengkap sesuai Payye Name GA saya dan akhirnya dalam 3 hari langsung dapet deh email Verifikasi dari Google Adsense Indonesia.
Penanya: Loh kenapa Google Adsense Indonesia mas, bukannya GA itu ada di Amerika?
Saya: Pastinya kita juga sebagai Warga Indonesia kan, jadi mesti ke Adsense Google Indonesia juga donk.
Penanya : Oh, begitu ya mas?
Saya: Yups, benar sekali.
Penanya: Thanks ya mas,
Saya: Sama-sama

Tanya jawab diatas adalah Tema utama bagaimana saya mendapatkan PIN Adsense Google dalam 3 hari.
Awalnya GA saya pun sudah mau di Tutup oleh Google karena tidak kepalidan Nama dan Alamat, sebenarnya yang tidak membuat Falid itu cuma namanya aja. Karena Orang Indonesia harus menenantukan nama depan dan nama belakang atau nama keluarga. Sedangkan saya cuma menggunakan nama tanpa dua kalimat. Contoh Nama anda Budi nah ketika Daftar harus lengkap jadi Budi Budi. Biar cepet terkirim PIN nya dari Kantor POS, itu pun setelah Earning kita mencapai $10. he he

Mungkin cukup begitu saya tip info mendapatkan PIN dari Google dengan cara menggunakan email.
Semoga bermanfaat buat para Adsense Indonesia yang lainnya jika sudah berbulan-bulan tidak mendapatkan PIN GA.
Continue Reading... Label:


Akhirnya Ganti Templatenya Kang Rohman

0 komentar

Tech IDSebagai seorang nuwbi blogs, sudah banyak sekali hambatan dan rintangan yang dihadapi tanpa henti-henti. Hambatan dari membagi waktu dan menyisihkan waktu untuk berbagi Tips dan Trik seputar Dunia Internet.
Dengan menggunakan baju baru dari blogspottutorial nya kang rohman. Menjadikan Tech ID ini sedikit elegan dan lebih enteng. 


Sebelumnya Tech ID ini merupakan blogs yang amburadul sana sini, serta tidak karuan. hingga membuat pengunjung tidak suka berlama-lama. Mungkin karena seperti tempat pembuangan sampah kali yach. xi xi.
Dengan perubahan ini semoga Tech ID dapat memberikan Tip dan Trik Selanjutnya, baik dari sumber para netter  lainnya maupun dari pengalaman pribadi. 

Semoga apa yang sudah dijadikan niat ini mendapat manfaat untuk Tech ID dan juga semua kalangan. Menjadikan sumber informasi yang banyak memberikan informasi seputar Teknologi, Blogging, facebooking, Jaringan serta Kerusakan pada Komputer serta bagaimana penanganannya tanpa harus memanggil tukang service dan tidak menggeluarkan kocek (Free Income).
Kembangkan Potensi diri dengan belajar - belajar dan belajar. Tanpa belajar dari pengalaman dan orang lain tidak akan mudah untuk diri kita menemukan jati diri sendiri. 
Satukan tekat, potensi dan kemauan untuk berjuang dan maju. 

Salam Sukses. Tech ID


Continue Reading... Label:


Return to top of page Copyright © 2010 | Klik Icon dot com Converted into Blogger Template by HackTutors